
What this does
When you sign up, WorkRight creates a workspacefor your company. Everything you and your team do — leave requests, payroll runs, POSH training, employee records — lives inside it, and it's walled off from every other company on WorkRight. This guide walks you through the handful of one-time setup steps so your workspace is genuinely useful, not just empty.
New workspaces start on a free trial with all modules unlocked, so you can explore everything before deciding what you need. Once the trial ends, the modules you keep depend on your plan.
Who can do it
- Role: the person who signs up becomes the company admin (
company_admin). Workspace settings, inviting people and choosing a plan are HR-admin tasks — acompany_adminorhr_manager. Regular employees see only their own modules. - Plan:during the trial every module is available. After the trial, modules that aren't on your plan are simply hidden from the sidebar — nothing breaks, the menu item just isn't there. See pricing.
Find your way around the dashboard
After you sign in you land on the dashboard— your home base. From the top down you'll usually see a trial countdown, a welcome line, your My queue widget (anything waiting on you across modules), a getting-started checklist, and a “Jump into a module” grid of shortcuts. The left sidebar is your main navigation; it only shows the modules your plan includes.
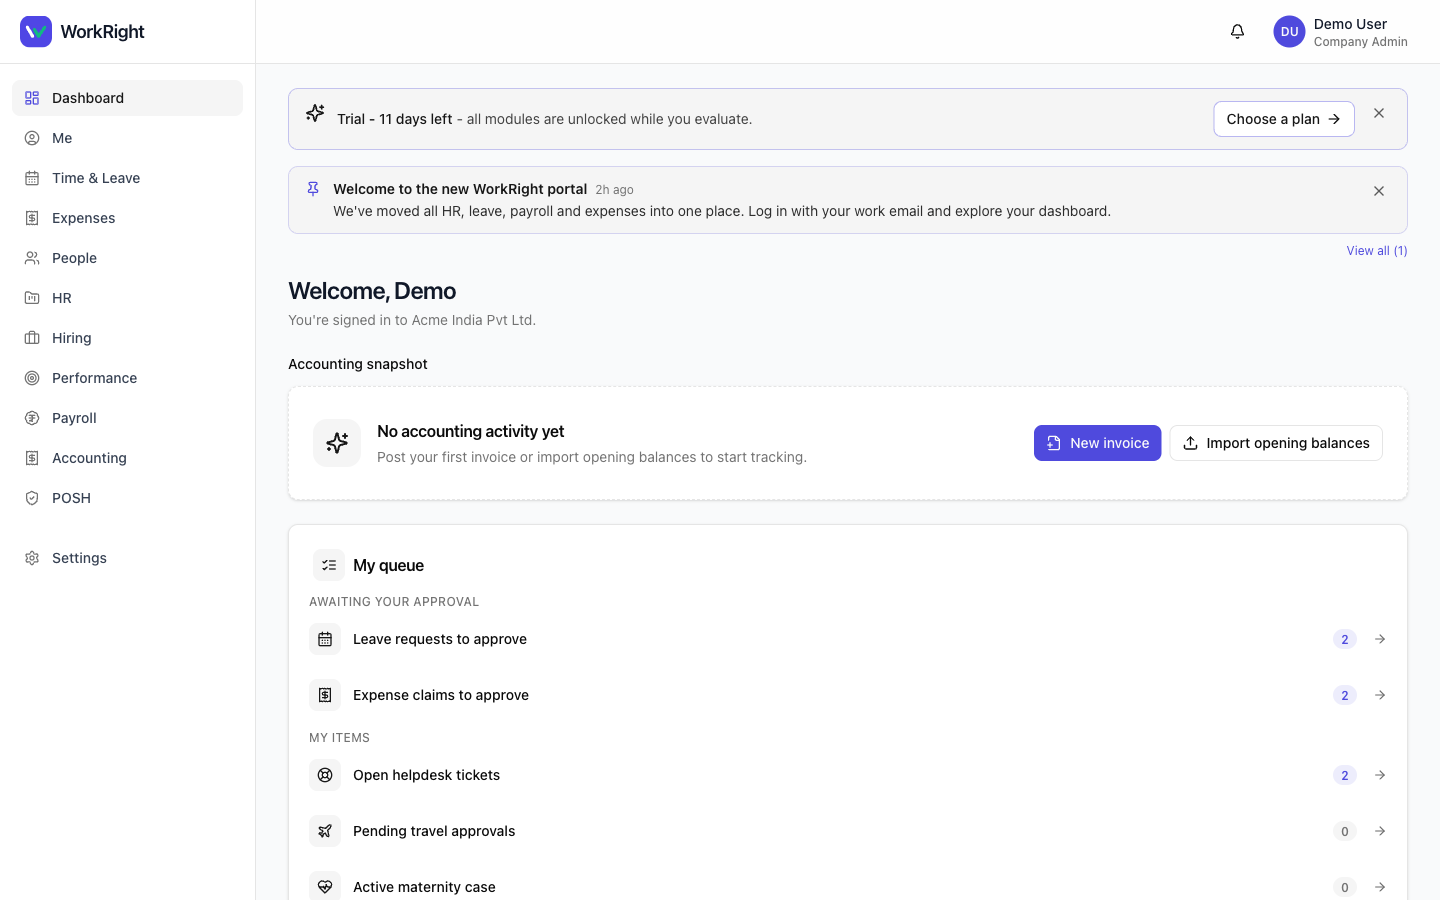 Click to enlarge
Steps
- From the dashboard, work through the getting-started checklist. Each row links straight to the right screen and ticks itself off when there's a real signal (for example, once you've added a teammate).
- Open Settings → Workspace and set your workspace handle and your Professional Tax state (details below). Save.
- Go to People and invite your team — add employees one at a time, or import a CSV in bulk.
- Use the “Jump into a module”grid (or the sidebar) to open whatever you came for — Time & Leave, Payroll, POSH, and so on — and start configuring it.
- When you're ready, head to Settings → Billing to choose a plan so you keep the modules you want past the trial.
The two workspace details that matter
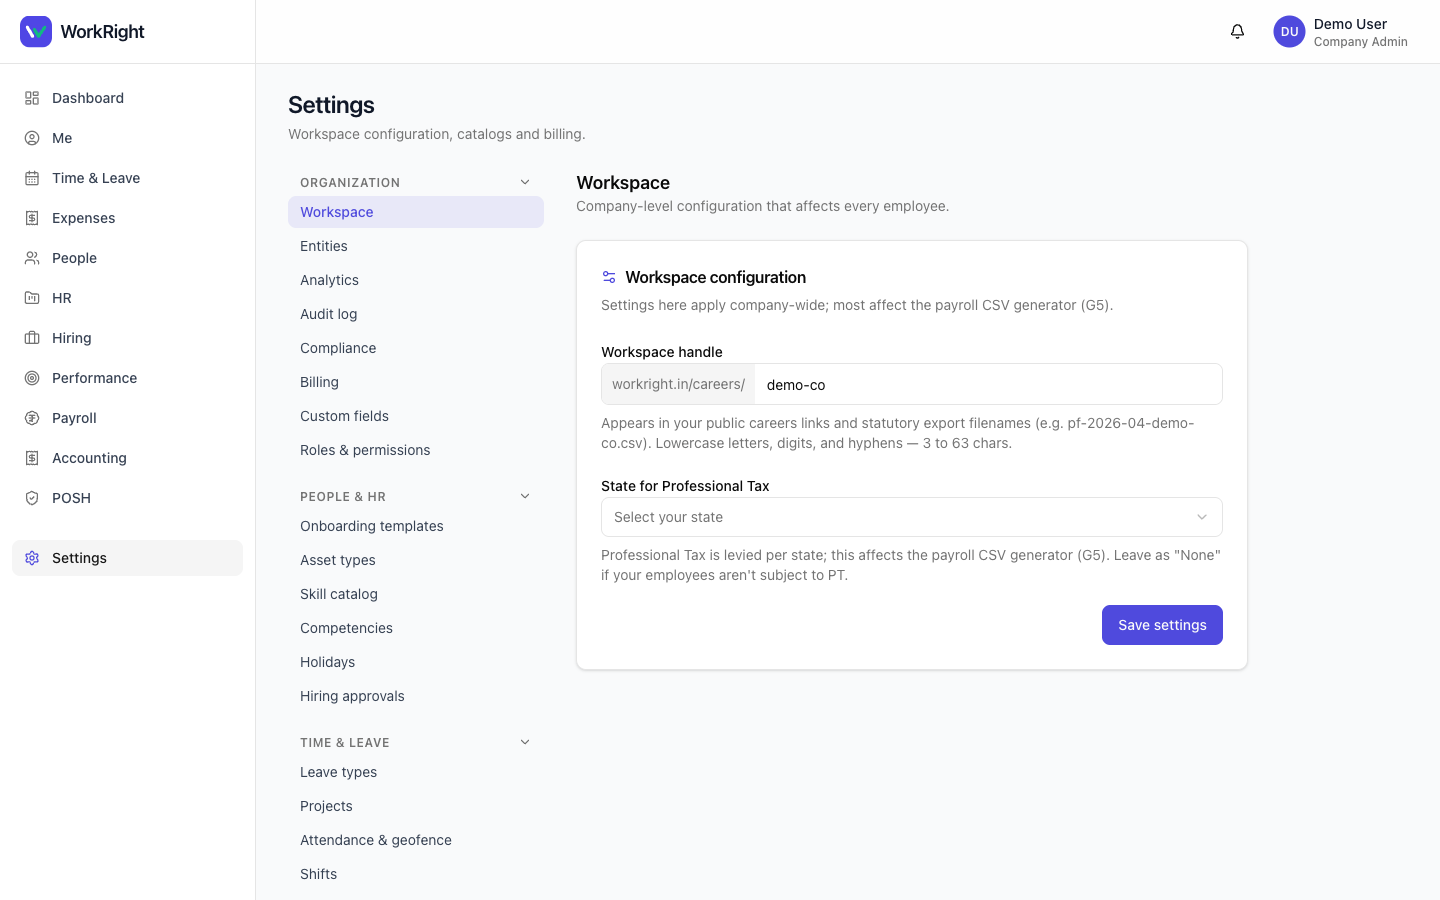
Settings → Workspace is short by design — two fields do most of the work:
 Click to enlarge
- Workspace handle — the short, public name that appears in your careers links (e.g.
workright.in/careers/acme-corp) and in statutory export filenames. Use lowercase letters, digits and hyphens, 3 to 63 characters. Pick it once and leave it: changing the handle later breaks any links you've already shared. - State for Professional Tax — the state your employer is registered in. PT is levied per state, so this drives the right PT slab in the payroll generator. Leave it as None / Not applicableif your employees aren't subject to Professional Tax.
Where everything else lives
Beyond Workspace, the Settingsarea groups the rest of your configuration so it's easy to find later:
- Organization — workspace, entities, audit log, billing, custom fields, and roles & permissions.
- People & HR — onboarding templates, asset types, holidays, and more.
- Time & Leave — leave types, attendance and shifts.
- Expenses, Accounting, Hiring and Communication each have their own catalog settings too.
You only see the groups your role can manage, so don't worry if your list is shorter than this.
Tips
- You don't have to finish setup in one sitting — the getting-started checklist stays on your dashboard until every step is done (or you dismiss it), and it doesn't vanish the moment your trial converts to a paid plan.
- Set your Professional Tax state before your first payroll run so the deductions come out right.
- Importing a team from a spreadsheet? Use the CSV import on the People screen instead of adding everyone by hand.
Related
- Add or onboard an employee — invite your team and fill in their details.
- Roles, access & two-factor (2FA) — who can do what, and turning on 2FA.
- Plans & pricing — pick a plan when your trial is ending.
- HR software for India — what WorkRight covers, end to end.