
What this does
An expense claim is a single reimbursable spend — an amount, a category, a merchant, a date and (usually) a receipt. Employees file claims; approvers review them; and an HR admin pays out approved claims in a reimbursement batchrather than one transfer at a time. WorkRight tracks each claim's status all the way from draft to reimbursed, so nobody has to chase a payment over email.
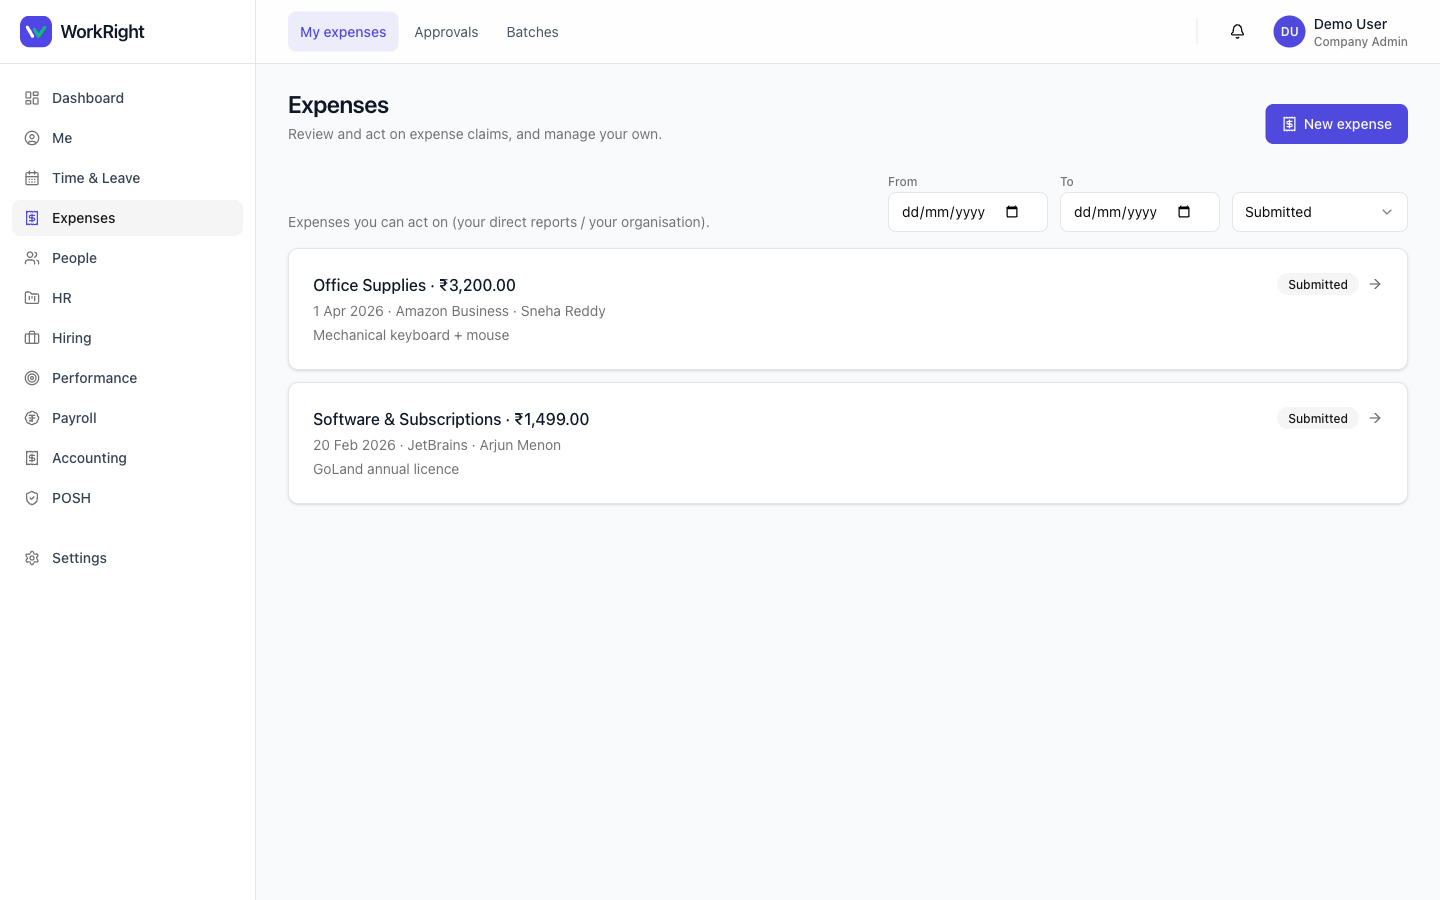 Click to enlarge
Who can do it
- Any employee can file a claim and track their own reimbursements.
- Approvers (a
manager,hr_managerorcompany_admin) also see an Approvals inbox of claims from their reports and can approve or reject them. - HR admins (
hr_manager/company_admin) build and run reimbursement batches and manage expense categories. - Plan:the Expenses module must be enabled on your plan — if it isn't, the menu item is hidden. See pricing.
Steps — file a claim
- Open Expenses in the sidebar and click New expense.
- Fill in the claim — amount, category, merchant, date and an optional description — and save it as a draft.
- On the saved claim, attach your receipts. You can add more than one. If the category is set to receipt required, you'll be warned until you attach one.
- Submitthe claim. It moves to your approver's inbox, and you can track it from submitted through to reimbursed.
Steps — approve a claim
- Open Expenses → Approvals to see claims awaiting your decision.
- Open a claim to check the amount, category, merchant and receipts.
- Approve or reject it. You can add decision notes — useful when sending a claim back.
Steps — reimburse approved claims
- Open Expenses → Batches (HR admins only).
- Build a batch from approved-but-unpaid claims, then run it. Reimbursed claims show their batch reference, so each payment is traceable back to a claim.
Categories & travel pre-approvals
Under Settings → Expense categories, an HR admin sets up the categories employees pick from. Each category can carry rules — whether a receipt is required, a maximum amount cap, a GL codefor your books, and whether it's active. There's a restore defaults option to seed a standard set.
For spend that needs sign-off before it happens, use Travel pre-approvals. An employee requests budget for a trip before booking; a manager or HR approves it. It has the same two-tab shape as expenses — your own requests under Mine, and (for approvers) requests awaiting you under Approvals.
Tips
- Attach receipts before submitting — a category marked receipt required will keep flagging the claim until you do.
- Use decision notes when you reject a claim, so the employee knows exactly what to fix and resubmit.
- Reimburse in batchesrather than one-off transfers — it's faster and keeps every payment tied to its claim.
- For known trips, raise a travel pre-approval first so the budget is agreed before anyone books.
Related
- Expense management for India — what the module covers.
- Books, GST/TDS, period locks & reports — where category GL codes land in your books.
- Run your first payroll — the other money your team is owed each month.